Sunday, October 30, 2016

Simplicity Wooden Clock

[Updated August 2017 with walnut hands]

I've always had a thing for unique clocks and timepieces. They're harder to find than you might think. Try Googling it. Go ahead, I'll wait. All done? Great. Then you've noticed that any "unique clocks" or similar search mostly returns your traditional clock hands with a different printed face. These are often humorous and entertaining, but not really what I want. One day I ran across plans for a wooden clock and knew I was hooked.

This is going to be a long post. :)


In August of 2009, I purchase plans for Simplicity. I had no woodworking skills at the time and had planned to make all the parts by hand on a scroll saw. I had a friend who provided the tools and helped me in purchasing the birch plywood. However, the time commitment didn't meet his interest level, so he bailed on the project. Lacking the proper tools, I put the project aside for several years. I'm grateful he selected the plywood for me. It's what I ended up using in the final project.

Five years later, I had started doing the projects on this blog and purchased a CNC machine. It's the most awesome tool ever! After a couple dozen hours tweaking the design files, I started cutting pieces.


I learned a lot about my new CNC during this process. If I had it to do again, I'd be faster, make fewer mistakes, and throw away far fewer bad pieces. Regardless, the final pieces came together well.


The dremel tool was invaluable for cutting the brass pieces, which are both functional and visually striking in the wooden clock.

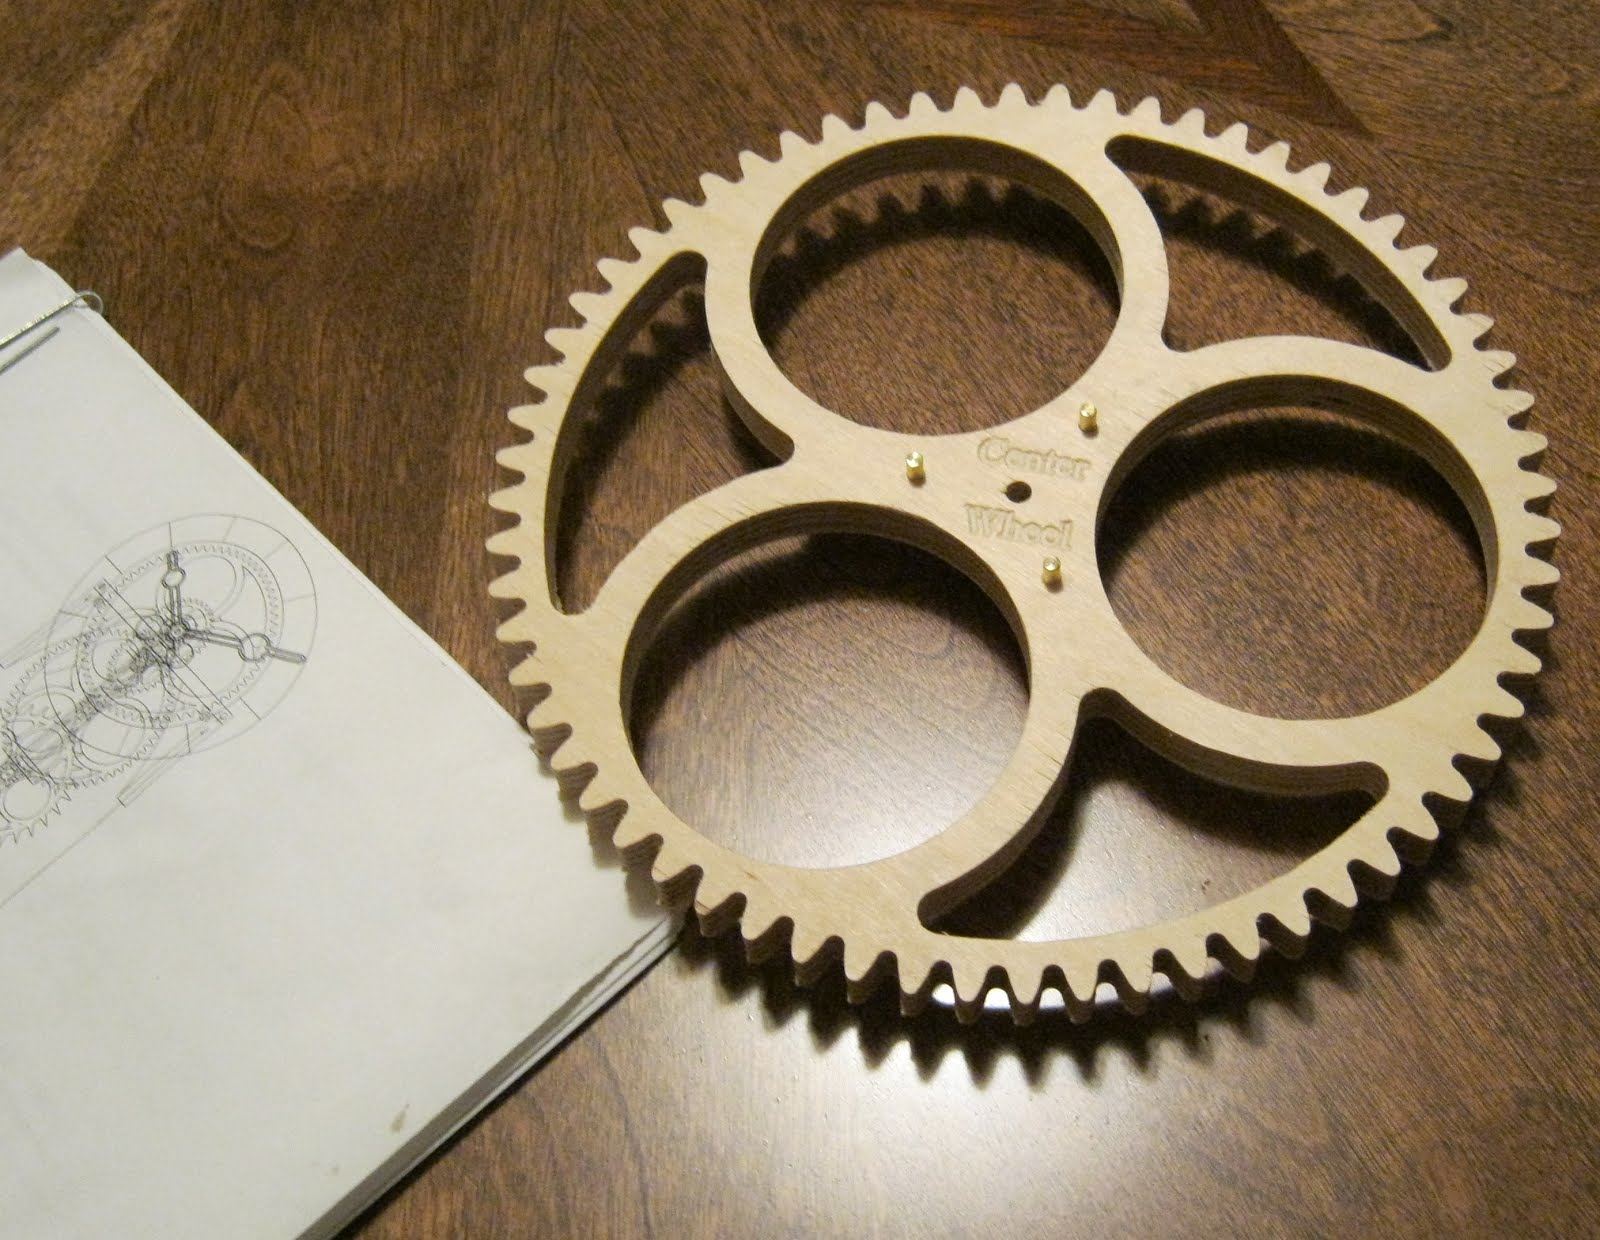
Just when everything was finally coming together, we packed everything up and moved. The new house's projects took up most of my free time and you can see many of them chronicled here. A couple months ago, I got around to working on the clock again. By this point, I was worried that my novice approach and compounded mistakes would prevent the clock from ever running. Still, it looked nice!


One of my biggest problems was trying to use a hand drill in place of a drill press. The precision of the clock requires true, perpendicular drilling. I ended up needing to fill in, sand, and re-drill some of the holes on the drill press I have since acquired. In this picture, I have the escapement gear filled in and ready to be sanded and drilled.


At last everything was filed down and sanded to perfection. The gears meshed well and the frame was mounted on the wall for final troubleshooting. I needed a weight for initial testing and grabbed the first thing I saw in the kitchen: a stock pot. It looked funny, but worked great. First, I ran the clock without any escapement to break in the gears. Afterwards, the escapement and pendulum were added.


Before tinkering and adjustments, the clock would run for a few minutes at a time before seizing. The first time it ran through the night was as exciting as when my son first slept through the night. I placed a scale under the pot to determine how much weight the scale would need to bear before the clock would stop. Subtracting the scale's reading from the pot's weight gave me an idea of how much weight the clock requires to run. I made some weights, filled them with pennies, and returned the pot to my wife.


With the weights, the full clock is complete! It actually runs, tells good time, and is tremendously satisfying to watch. I'm stoked! The clock is magnificent and has a pleasant, steady tick. It runs for maybe 30 hours on a wind using a 2.75 lb weight.


Thanks for reading. It's been a long road and I'm very pleased with how everything turned out.

(August  2017 update) The clock has been ticking steadily for months now! I finally decided it was too hard to read the time from a distance, so I replaced the original birch ply hands with walnut hands. They provide a nice contrast.

Sunday, October 23, 2016

Another End Grain Cutting Board

I don't know why I decided to do another cutting board. The last one took lots of time and the lumber alone for this one cost $40. I just had the itch, I guess. Maybe I'm a masochist also. This wood is cherry and maple with some nice, dark walnut on the sides.


This time I tried using my CNC machine as a planer. It worked remarkably well! This picture was taken from the CNC webcam I set up so I can monitor the machine from my computer or tablet. The picture quality is okay and it allows me to get stuff done while I gawk at the machining process.


After planing, it's back to cutting on my updated table saw (a flea market find and much improved/safer than the old one), flipping pieces around, and gluing again. I had hoped for a larger board, but had a few cutting problems that results in some pieces being unusable.

In this picture, the final glue-up is complete and the board is ready to be planed for the final time. Because it's end-grain, a normal planer won't safely work. Last time I belt-sanded for hours. This time it only took a half hour on the belt after the CNC pass.


Finally, it's finishing oil and complete! I love this step because it's quick and the wood turns even more beautiful. I haven't decided if I want to keep it or find a way to sell it to support future projects.

Thursday, October 20, 2016

Marble Maze Board

Let's take a break from useful projects and do something fun! I've been throwing around several ideas for making labyrinth toys out of wood. It would be fun to have mazes that span both sides of the board, possibly changing sides as it travels. There are lots of possibilities, but I started a little simpler to prove out the idea.


The maze is fun to solve! It was created on my CNC machine using a program I wrote to design the maze, trace it out with a flat-end (cylindrical) bit, then carve out a wider path underneath the openings with a ball (round) bit. The last step was a little tricky because the machine has to traverse the entire maze without retracting and plunging, except in the starting spot. The intention was for the marble to remain stuck in the maze even when the board is held upside-down. It's a little easier to see in the close-up.


It doesn't quite work, however. The marble can still fall out at any junction of three or more paths. Still, the issue isn't insurmountable and, with a little more math, I think I can work around it.

Incidentally, what I carved was a 6-junction maze, where the maze can consider 6 different ways of leaving any given point. I also designed the program to work with 3-junction mazes and the traditional 4-junction mazes. The mock-ups below show the differences, but the program isn't able to simulate the round ball bit the way I described earlier so it's not a perfect preview of the process.

Friday, September 30, 2016

Penny Arcade Fix

I was recently contacted through Craigslist by a gentleman who collects old American juke boxes and penny arcade machines. He had an old machine that needed some replacement parts. If you've ever been to a tourist spot and seen the machines that crank pennies into souvenirs, then you recognize the premise. This one is from the 40s, required a dime or two and a penny, then dispensed a pressed penny with the Lord's Prayer and a hole in the top to be used as a keychain.
 

The funny thing about the machine was that it was all a ruse. The wheels would turn, the penny would move, but nothing would actually press the penny. And nothing even pretended to stamp the hole in the top. Rather, the machine put on a show, then dispensed a token from an internal hopper. The gentleman needed to replace the wheels, which had worn out and been repaired past the end of their useful lives. They were just there for looks, so it's merely a matter of replicating the appearance.


He left me with one of the wheels for reference. It's about an inch thick, so I milled down 3/4" pine to make the two halves.


After that, a rough cut is performed, followed by a simple 3d cut to match the appearance of the original wheel. Last, a profile cut gives the wheel its shape.


I made four of these total, then glued them back-to-back to make two duplicate wheels. Painted up, I'm sure they'll make excellent replacements for the penny machine.

Saturday, May 7, 2016

Garden Box

In early April, with snow covering the ground at this elevation, it's time to start prepping for a garden. We wanted an area we could fill with good dirt and that we could seclude from rabbits. We opted for a fenced garden box. We also wanted a gate so it's easier to weed and kids can get in and out without destroying the fencing.

The fence was made with leftover cuttings from the basement shelf project and held together with 2x4. It turned out to be much sturdier (and heavier) than I needed.


The box frame was made from a couple larger boards. I added 2x4 supports for the fence and gate. We stained everything with deck stain so it would last longer outdoors.


Meanwhile, we'd planting seeds indoors. The weather here is unsuitable for planting before Mother's Day, so seedlings need to start indoors and transplant later.


After clearing out a section of grass in the back yard, we placed the garden box and laid down weed barrier before adding fill dirt and compost.


After transplanting the seedlings, I added on a mesh to keep out rabbits and we're done. Luckily, deer have on interest in jumping the fence to the back yard, but rabbits will make quick work out of any garden they can access.

Friday, January 1, 2016

Simple Shelf

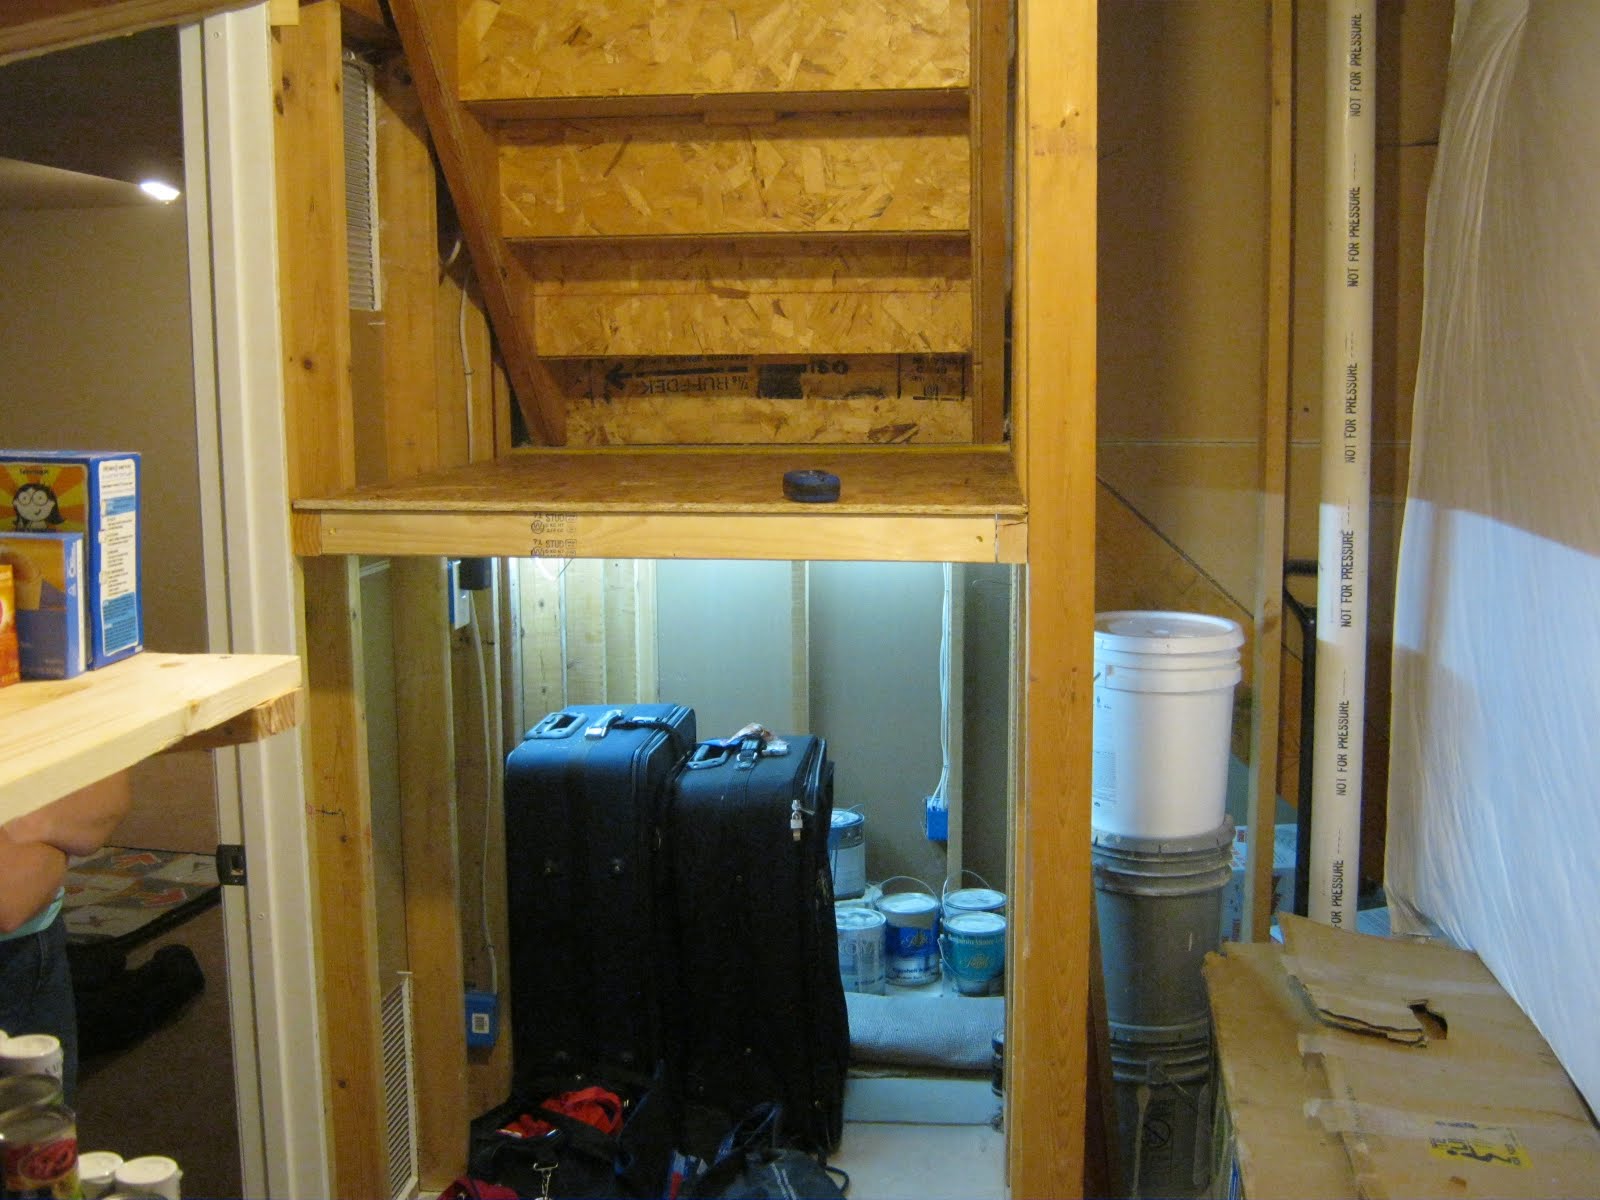
Our basement has some under-stair storage area where we cram stuff like luggage that we don't need most of the time. It's always been badly lit, so we kept a flashlight down there to make it easier to rummage through stuff. Looking at it, I thought it would be nice to expand the storage area a bit with a simple shelf and maybe improve the lighting while I'm at it.


I used 2x3 boards for support underneath, planning to use some OSB (like plywood) for the shelf itself, which I had left over from the garage shelves a few months ago.


Unfortunately, one of the boards split while I was nailing it in. In retrospect, the nail was a little too close to the edge to have driven it in without any sort of pilot hole. I didn't want to remove and replace the board, so I fixed it in place and added an additional nail below the split.


The first three supports were easy to add. The fourth had to be secured to its neighboring supports, which meant installing screws at an odd angle. For that, I made a dead-simple jig using scrap 2x4 and my miter saw.


After adding the OSB panel, I installed some LED strip lighting I had left over from last month's under cabinet lighting project. They're plugged directly into a half-hot outlet, so they turn on automatically with the lights. No more flashlights!

Saturday, September 12, 2015

Under Cabinet Lighting

Under cabinet lighting add a nice, modern touch to kitchens. They seem popular now, but most solutions look expensive. I put together my own version for less than $10.

I need a controller for activating and dimming the lights. I didn't have a readily accessible light switch I could use for them and I thought it'd be fun to control the lights over wifi with your phone/tablet/computer. To that end, I designed my own circuit board, had it printed, and soldered on my components. I also programmed up an ESP8266 chip to have its own web server. If all of this seems like too much work (it is!), you can also get IR remote controls for cheap that will work on LED strips.
 

The web interface works for any device on our wifi network. It gives you the option to control how bright the lights are and to automatically turn them off after a set amount of time. It's great for watching movies at night.


The next step, of course, is to install the LED strips. These are both cheap and easy to use. They have a self-adhesive on one side and I applied a little hot glue to make sure they wouldn't come off over time.
In the first picture, I'm attaching the strips and fixing the broken cabinet bottoms at the same time. The wedges I'm using are left over from the basement shelves project. They turned out to be more useful than I'd anticipated.


Once everything is hooked up, I tested it out in the daylight before cleaning the kitchen. It adds an accent to the kitchen.


But it's much cooler at night.