Thursday, October 20, 2016

Marble Maze Board

Let's take a break from useful projects and do something fun! I've been throwing around several ideas for making labyrinth toys out of wood. It would be fun to have mazes that span both sides of the board, possibly changing sides as it travels. There are lots of possibilities, but I started a little simpler to prove out the idea.


The maze is fun to solve! It was created on my CNC machine using a program I wrote to design the maze, trace it out with a flat-end (cylindrical) bit, then carve out a wider path underneath the openings with a ball (round) bit. The last step was a little tricky because the machine has to traverse the entire maze without retracting and plunging, except in the starting spot. The intention was for the marble to remain stuck in the maze even when the board is held upside-down. It's a little easier to see in the close-up.


It doesn't quite work, however. The marble can still fall out at any junction of three or more paths. Still, the issue isn't insurmountable and, with a little more math, I think I can work around it.

Incidentally, what I carved was a 6-junction maze, where the maze can consider 6 different ways of leaving any given point. I also designed the program to work with 3-junction mazes and the traditional 4-junction mazes. The mock-ups below show the differences, but the program isn't able to simulate the round ball bit the way I described earlier so it's not a perfect preview of the process.

Friday, September 30, 2016

Penny Arcade Fix

I was recently contacted through Craigslist by a gentleman who collects old American juke boxes and penny arcade machines. He had an old machine that needed some replacement parts. If you've ever been to a tourist spot and seen the machines that crank pennies into souvenirs, then you recognize the premise. This one is from the 40s, required a dime or two and a penny, then dispensed a pressed penny with the Lord's Prayer and a hole in the top to be used as a keychain.
 

The funny thing about the machine was that it was all a ruse. The wheels would turn, the penny would move, but nothing would actually press the penny. And nothing even pretended to stamp the hole in the top. Rather, the machine put on a show, then dispensed a token from an internal hopper. The gentleman needed to replace the wheels, which had worn out and been repaired past the end of their useful lives. They were just there for looks, so it's merely a matter of replicating the appearance.


He left me with one of the wheels for reference. It's about an inch thick, so I milled down 3/4" pine to make the two halves.


After that, a rough cut is performed, followed by a simple 3d cut to match the appearance of the original wheel. Last, a profile cut gives the wheel its shape.


I made four of these total, then glued them back-to-back to make two duplicate wheels. Painted up, I'm sure they'll make excellent replacements for the penny machine.

Saturday, May 7, 2016

Garden Box

In early April, with snow covering the ground at this elevation, it's time to start prepping for a garden. We wanted an area we could fill with good dirt and that we could seclude from rabbits. We opted for a fenced garden box. We also wanted a gate so it's easier to weed and kids can get in and out without destroying the fencing.

The fence was made with leftover cuttings from the basement shelf project and held together with 2x4. It turned out to be much sturdier (and heavier) than I needed.


The box frame was made from a couple larger boards. I added 2x4 supports for the fence and gate. We stained everything with deck stain so it would last longer outdoors.


Meanwhile, we'd planting seeds indoors. The weather here is unsuitable for planting before Mother's Day, so seedlings need to start indoors and transplant later.


After clearing out a section of grass in the back yard, we placed the garden box and laid down weed barrier before adding fill dirt and compost.


After transplanting the seedlings, I added on a mesh to keep out rabbits and we're done. Luckily, deer have on interest in jumping the fence to the back yard, but rabbits will make quick work out of any garden they can access.

Friday, January 1, 2016

Simple Shelf

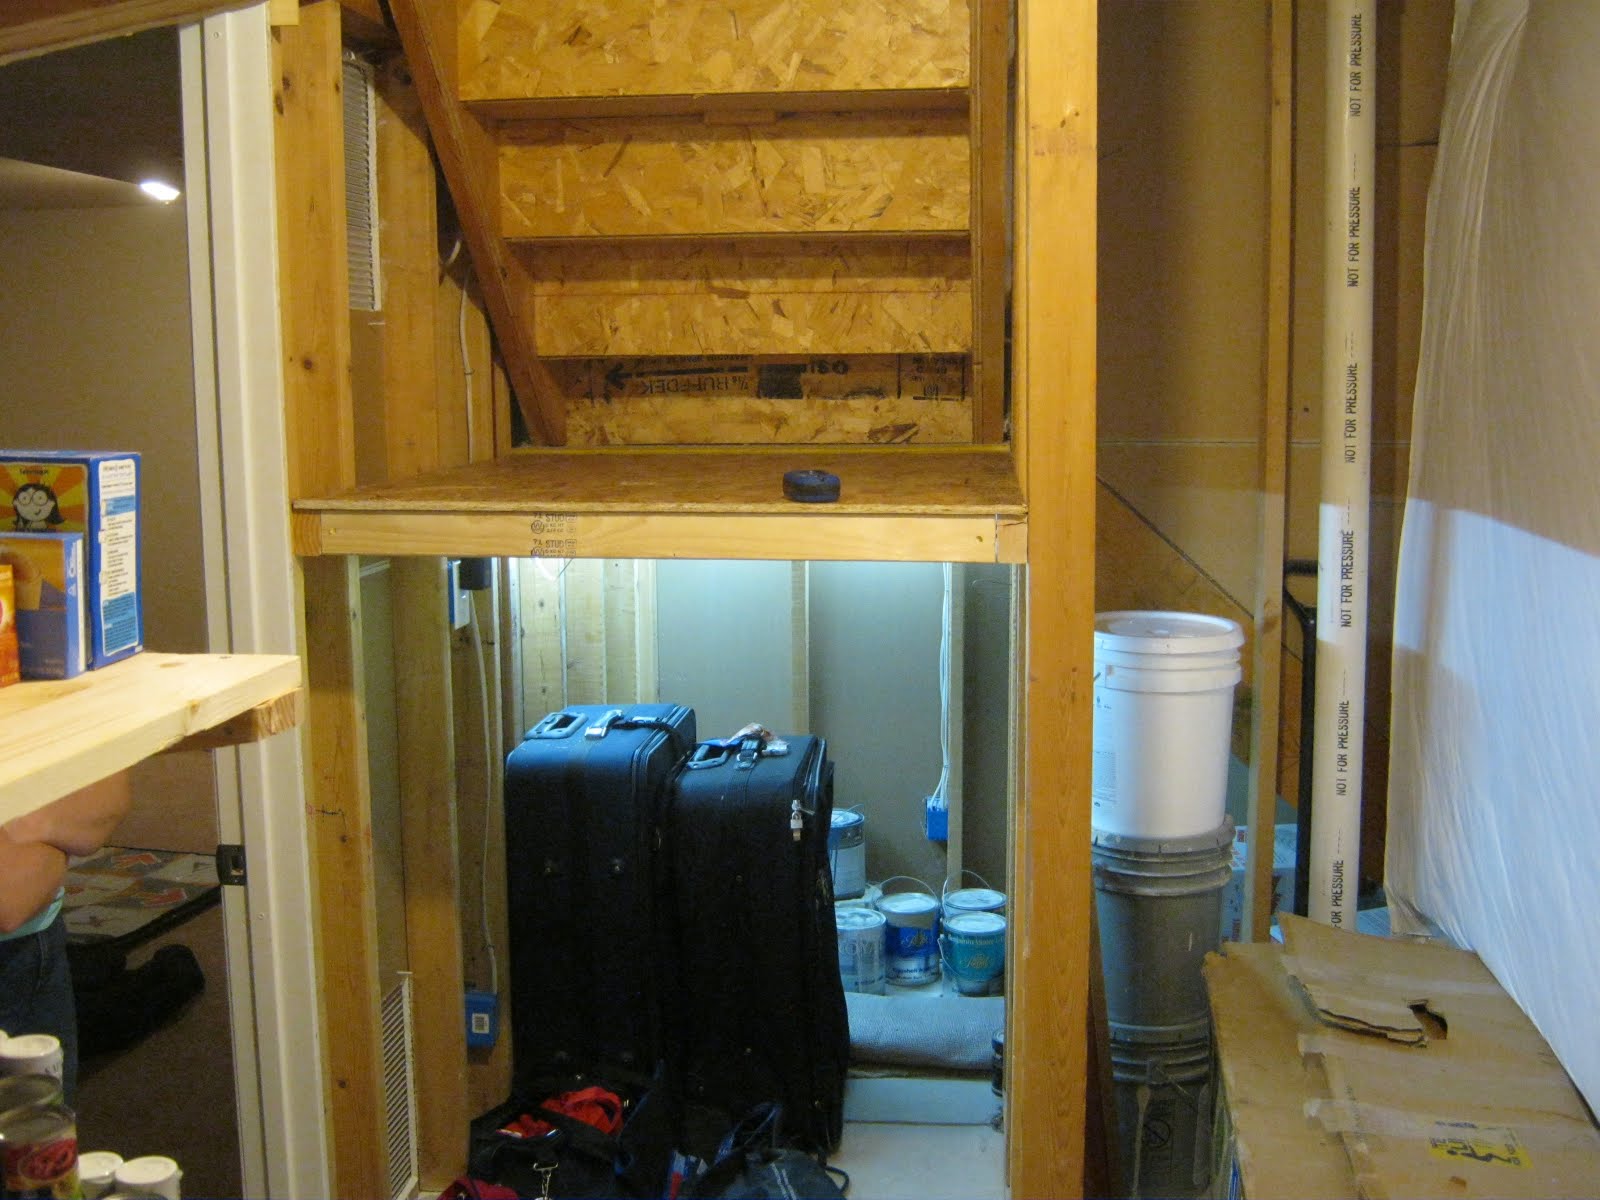
Our basement has some under-stair storage area where we cram stuff like luggage that we don't need most of the time. It's always been badly lit, so we kept a flashlight down there to make it easier to rummage through stuff. Looking at it, I thought it would be nice to expand the storage area a bit with a simple shelf and maybe improve the lighting while I'm at it.


I used 2x3 boards for support underneath, planning to use some OSB (like plywood) for the shelf itself, which I had left over from the garage shelves a few months ago.


Unfortunately, one of the boards split while I was nailing it in. In retrospect, the nail was a little too close to the edge to have driven it in without any sort of pilot hole. I didn't want to remove and replace the board, so I fixed it in place and added an additional nail below the split.


The first three supports were easy to add. The fourth had to be secured to its neighboring supports, which meant installing screws at an odd angle. For that, I made a dead-simple jig using scrap 2x4 and my miter saw.


After adding the OSB panel, I installed some LED strip lighting I had left over from last month's under cabinet lighting project. They're plugged directly into a half-hot outlet, so they turn on automatically with the lights. No more flashlights!

Saturday, September 12, 2015

Under Cabinet Lighting

Under cabinet lighting add a nice, modern touch to kitchens. They seem popular now, but most solutions look expensive. I put together my own version for less than $10.

I need a controller for activating and dimming the lights. I didn't have a readily accessible light switch I could use for them and I thought it'd be fun to control the lights over wifi with your phone/tablet/computer. To that end, I designed my own circuit board, had it printed, and soldered on my components. I also programmed up an ESP8266 chip to have its own web server. If all of this seems like too much work (it is!), you can also get IR remote controls for cheap that will work on LED strips.
 

The web interface works for any device on our wifi network. It gives you the option to control how bright the lights are and to automatically turn them off after a set amount of time. It's great for watching movies at night.


The next step, of course, is to install the LED strips. These are both cheap and easy to use. They have a self-adhesive on one side and I applied a little hot glue to make sure they wouldn't come off over time.
In the first picture, I'm attaching the strips and fixing the broken cabinet bottoms at the same time. The wedges I'm using are left over from the basement shelves project. They turned out to be more useful than I'd anticipated.


Once everything is hooked up, I tested it out in the daylight before cleaning the kitchen. It adds an accent to the kitchen.


But it's much cooler at night.

Wednesday, August 26, 2015

Tool Pegboard

This was a pretty easy and quick project that makes accessing tools a lot easier. I found a guy selling lots of pegboards on Craigslist, so I grabbed a couple.

The first step is to size some spacers. If the pegboard is mounted directly against the wall, there won't be room behind it for the hooks to fit in. To create a little space, I used some leftover wood scraps from the basement shelves.


Once everything was fitted and checked for size, the spacers were attached directly to the garage wall.


After I drill pilot holes, my wife attached both pegboard panels with washers. She loves organization and was very excited for this project. She mentioned that her mother once set up a similar pegboard for her father in an effort to keep the garage cleaner, but her father didn't like the bother of replacing tools back in their place afterwards.


She also arranged all the hooks on the boards. It's convenient to use and easy to find the tools I want. I even put them back afterwards. :)

Saturday, August 22, 2015

Basement Pantry Shelves

Yes, another post with even more shelves. These are going in the unfinished area of the basement that holds the furnace and water  heater. The area is spacious enough to accommodate some good shelves for storage and, because it's inside, I wanted them to look a little nicer than my garage shelves. I settled on these plans for their nicer appearance, even if they were a bit more work.

The first step was to cut a bunch of 2x3 boards using a circular saw, rather than the World's Cheapest Table Saw, which I really do need to replace at some point. The circular saw worked well enough. I used a miter saw to angle the ends of the pieces on the left, which will be inserted at an angle later in the process.


I assembled the cut pieces to 2x4 boards using both nails and glue. Nails will hold it into place while the glue dries, and the glue will ultimately provide a lot of the reinforcement.


All three beams were assembled and ready to go in the basement.


In the basement, the beams were attached to overhead supports. I used furring strips to form the lateral surfaces. My wife dug through the pile at the hardware store to find the straightest ones they had available, which saves some money vs. using common board.


The rest of the furring strips are placed and secured with screws. Then the shelves are filled with food, nicely complementing the small pantry next to our kitchen. Despite appearances, the shelves are sturdy enough to stand on, though we haven't tried that while the glass jars are on them.