For Christmas, I made my wife a ravioli rolling pin. Amazon sells a few different types of these, but most don't work well because the space between individual ravioli is too narrow and doesn't adhere well. I spotted a Kickstarter project for a deluxe version some time ago that looked much better. The project description even included dimensions, making it easier to adapt the design for my 4th axis.
I started by gluing a couple pieces of maple together and roughly rounding them out so they'd fit on my CNC.
I used the CNC to cut it perfectly round, then added measured grooves with a large, round bit.
A flat-bottomed bit was used to create divets on four sides, then I hand-cut some strips to fit in. Each strip is 3/4" wide, which provides plenty of separation for the ravioli. I had originally planned to use a dark walnut here for contrast, but ended up going with cherry because I already had scrap pieces on hand.
A final pass on the CNC was used to level the strips and round everything out again.
After applying some food-safe seasoning oil, the wood really pops. It looks great.
Our first round of paste was a little messy (too much filling!), but turned out well. Lots of fun and easy to use!
Halloween is a fun excuse for making cool costumes and projects. I thought I'd try a Halloween decoration--something we could put in the yard on Halloween and use as decorations in our church's Trunk or Treat event.
The idea was to hide pairs of glowing eyes throughout the yard that would slowly light up, blink a few times, then fade back to darkness. With several of these hidden around, you can't tell where each one is hidden and the yard looks haunted. The original idea came from an article that wired a few of these together, but for my version I eliminated the wires and made each pair of eyes completely independent of the rest.
My first task was creating a simple circuit board. You could do this yourself with wires and a stick, but I was curious how well the CNC could do at making circuit boards. It did quite well! The results are easier than wires and cheaper to produce than anything you could buy.
Following that, I wrote a microcontroller program to control the eyes. The microcontroller makes this project utterly simple, requiring only one component to control all the blinking and allowing the various parameters to be randomized: how fast the eyes fade on/off, how many times they "blink", how long they stay dark, etc. This microcontroller, a PIC10F200, is roughly the size of a grain of rice. Larger versions are available, but I wanted to see if the CNC could machine boards with such fine details.
After programming the microcontroller, I added a battery holder and a pair of LEDs to each board. Just put in a battery to turn it on. I haven't tested, but a rough calculation leads me to think these will last 6 or 7 hours on a single battery, enough to leave them on all night. (Update: These were still running fine after 12 hours of overnight use.)
(November 2017 update) Here's a short video of them on the night of Halloween.
I've been playing around with making some halftone art using various techniques. My first attempt involved cutting a lined picture, painting the entire thing black, then sanding just the top to get the white (or wood color) for contrast. It didn't work at all. The pine wood was too soft and the ridges soaked in the paint. The lines were too close together because the workpiece was too small.
My next few attempts involved painting the wood with thicker paint before cutting, then milling the portions I wanted to be light. I used GIMP for my first attempt. If you want to try this yourself, just follow these steps: 1) Convert to grayscale: Image -> Mode -> Grayscale, 2) Apply a halftone filter: Filters -> Distort -> Newsprint (optional: change spots to lines).
I tried two other attempts using some free software called Halftoner. It's very easy to use and I recommend it over GIMP for this. I did both lines and dots. Dots look really cool up close.
Here's all three pieces side by side, starting with the most recent. At a distance, the Halftoner wavy lines look the best, but they looks awful up close. I wasn't terribly happy with any of the results. They were too small to allow the detail to show and, regardless, the pictures came out looking too dark.
Showing additional detail is simply a matter of increasing the workpiece size, but giving the pictures a lighter, happier look requires working on a white canvas rather than a black one. I ended up using whiteboard material. Specifically, I replaced the kitchen whiteboard, which was showing its age for dry erase markers, and used the old whiteboard panel to make a picture.
After milling, I painted the board with diluted black acrylic paint, the same stuff I used to paint the earlier boards. The paint easily wipes off of the white melamine, leaving a fun piece of art. With this success, I'll continue to use the technique on future halftone projects.
A CNC machine moves in 3 axes: X, Y, and Z. A "4th axis" adds rotation, allowing the machine to spin and cut the material. It's kind of a cross between a CNC machine and a lathe. 4th axis machining is really cool, but also expensive. A 4th axis attachment for my machine costs $800. Fortunately, a clever guy online had an idea for a DIY version. I set about making my own version of his idea.
Because I don't want to permanently modify my machine for this, I started by making attachments that will clamp on the machine's supports. All of the pieces are made with black HDPE plastic, generously provided by a friend of mine. It's the sort of plastic used in soda bottles, grocery bags, and my CNC machine.
Thanks to the dust boot from an earlier project, there was far less mess to worry about this time. You can see the minimal cleanup remaining after milling away this pinion from a large square of HDPE that originally went clear out to the blue tape.
I wanted the 4th axis to accommodate pieces of varying lengths so I wouldn't be stuck milling two linear feet of wood for each project. The slider below makes that possible by shifting to the length of the material.
When it's all put together, the assembly hold a piece of wood directly under the CNC's router. As the CNC machine moves back and forth, the rack and pinion cause the workpiece to spin. It's a clever system, really, provided the designed remembers that all text and design will come out backwards thanks to the gearing.
This is probably as difficult to visualize as it is to explain, so have a look at these videos. The first video shows the inaugural run making a simple cylinder with an indentation. I was very nervous that something would go terribly wrong (nothing works on the first try!), but it actually came out well.
For my second attempt, I made a fun spiral. It's much faster, thanks to a wider, more aggressive bit. Because of a design error I made, the spirals don't perfectly match up, but they're pretty close.
It works! I need some practice and tinkering time to understand how to use it well, but I have a few ideas planned. 3D carving might be really cool with this.
(October 2017 update) My next trial was an interesting 3d object: a 60-sided dodecahedron.
Last week, my wife bought some poster board and stencil to create signs for an HOA event. With the success of the recent drag bit boot, I thought I could quickly modify the design to hold a permanent marker instead. 5 minutes later, I had my experiment up and running on index cards.
With that success, we designed a fun, simple sign for the HOA.
We also did a separate sign with the date and hours so this sign could be reused each year. These were a lot of fun to do and worked out much better than stencils would have. I'm not sure how economic permanent markers are as an ink source, but for occasional use it's fast and easy.
I mentioned my interest in unique clock design when I posted about my first wooden clock. After completing that clock, I purchased plans for Clayton Boyer's Journey, a more complicated and intricate clock. It's a lot of fun to watch!
This is going to be another long post. :)
The first phase of the project is all electronic, converting files and adapting the design to be produced on my CNC machine. Considerations include material size, bit selection, and reducing material use. Here you can see the laptop's view of the CNC controls and the webcam monitor.
Besides sanding, many pieces need additional touches. These supports are drilled to allow allen set screws, which secure them to the clock's arbors.
Arbors are cut to length and polished using the paper plans as a guide.
The clock's unique serpentine race is too long for my CNC to cut in one pass, so I cut half of it, fed it through, then cut the other half. The waste piece from the race looks a lot like an serpent, especially if you draw eyes on it. After taking the pictures, I glued the two cut pieces together to form the race.
Most of the clock is made from birch plywood, which keeps its size well and doesn't warp much in humidity or with the change of temperature. That's very important for gear precision, but for the face and hands I went with something fancier, using cherry and walnut to provide color and contrast.
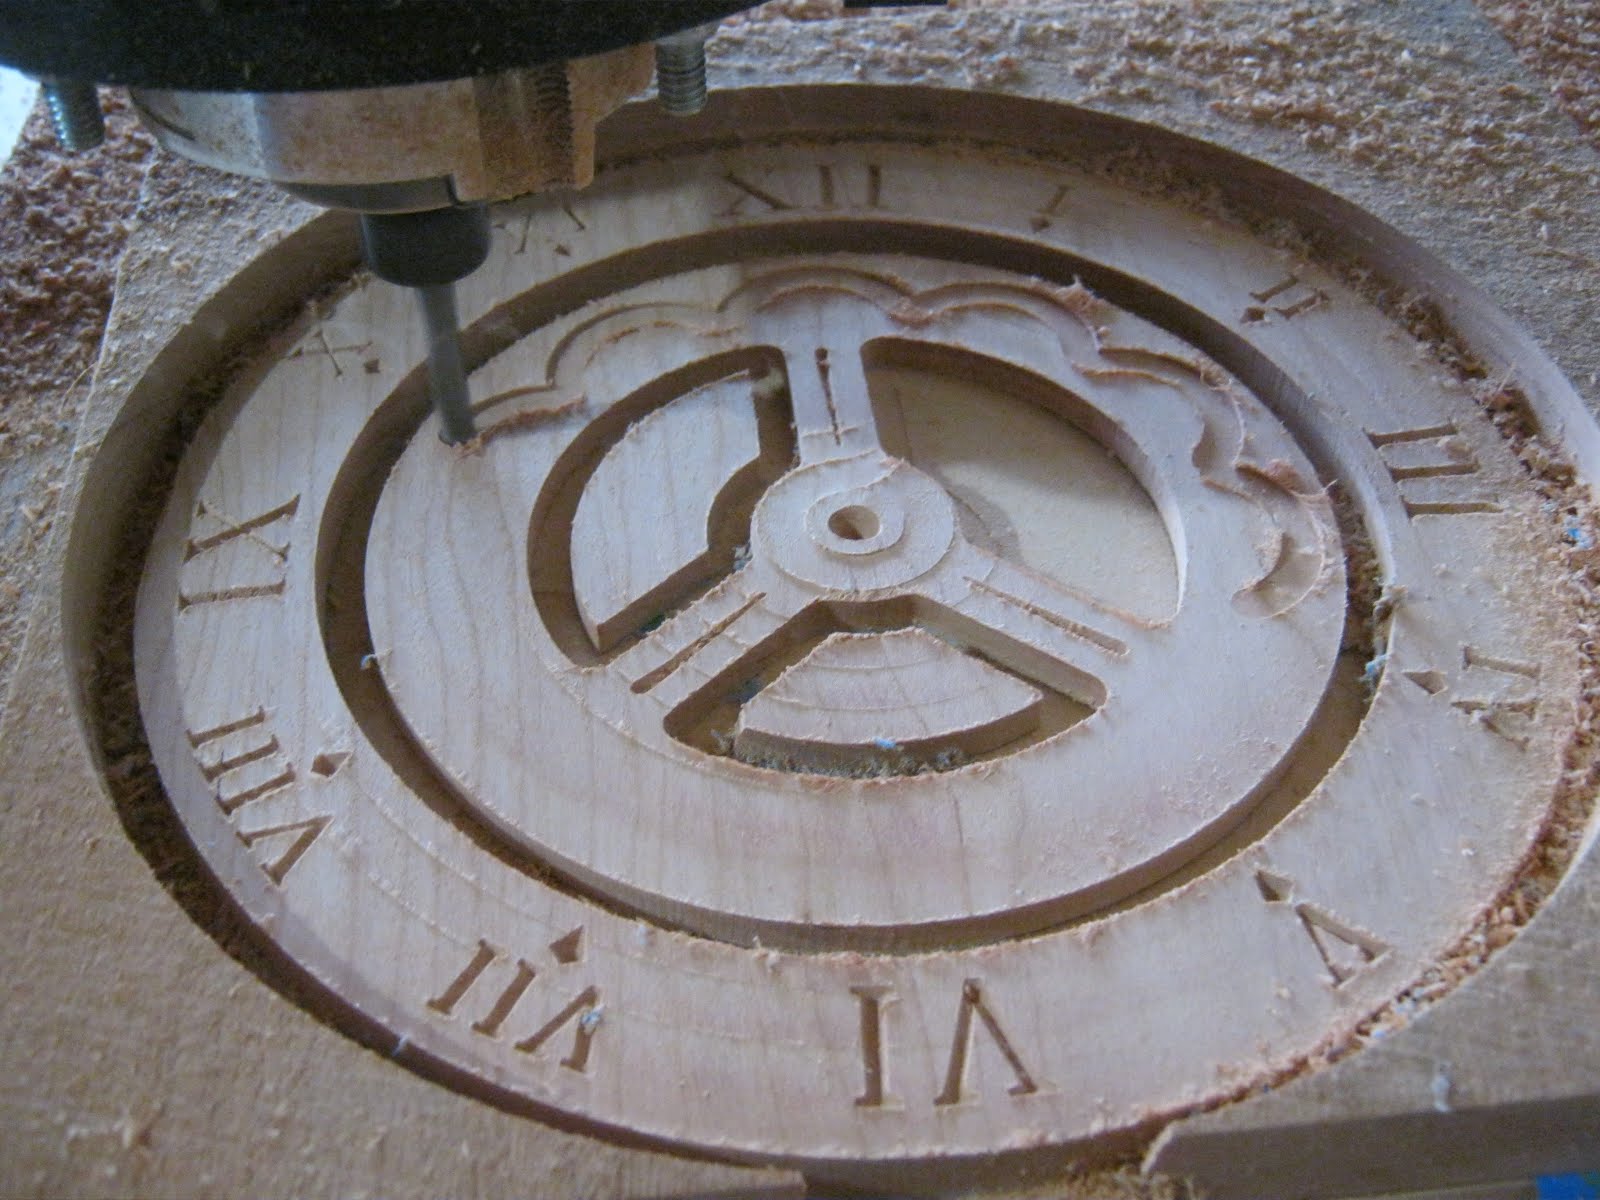
I wanted to inlay roman numerals in the face, so I started by engraving them in the wood with a V bit.
I cut both the face and the hypocycloid gear from the same piece of cherry, finished the cherry with an oil-poly mixture, then filled the engraving with superglue mixed with brass powder that I'd made by grinding a brass rod using a Dremel tool.
After curing, the superglue-brass was sanded off and the oil-poly mixture reapplied.
The hands were cut from a single piece of walnut, finished with the same mix, then the full face was glued together.
You may have noticed the pegs sticking out of the hour hand. The hour hand isn't driven directly by any normal gear. Instead, a cam on the back of the minute hand forces the hour hand around the hypocycloid gear in a way that easier to show than to describe.
The minute hand's movement is also intriguing. It's attached to a gear with a few more teeth than the stationary sun gear. A planet gear (the pinion moving around the outside of these two gears) forces the teeth into alignment as it travels, which causes the minute gear (and minute hand) to rotate. Again, this is easier to understand by watching than reading. For this video, I've removed the escapement and allowed the clock to run freely at a much faster rate.
Finally, the clock is complete. A chrome ball runs down the serpentine race, making electrical contact to engage the motor. The motor lifts the serpentine race, which provides the weight for the clock to run for several seconds until the process repeats. It's a lot of fun to watch!
One of the cool things you can do with a CNC machine is engrave metals and hard plastics using a drag bit, which is a pointed bit with a cheap, industrial-grade diamond. Unlike normal CNC bits, a drag bit doesn't spin while it works. Instead, it presses against the material as the machine drags it along the surface. The results look really cool and it's useful for engraving items like Zippo lighters
Unfortunately, drag big holders are too expensive (over $150) for most hobbyists that aren't using them to bring in business. Interestingly, the bits themselves are cheap (~$10). So I set about to make a budget-friendly holder.
My first attempt used a 1/4" aluminum tube capped with a small washer to prevent the bit from falling out. A piece of plastic goes between the spring and bit. The tube was capped with a screw to allow the bit to be replaced.
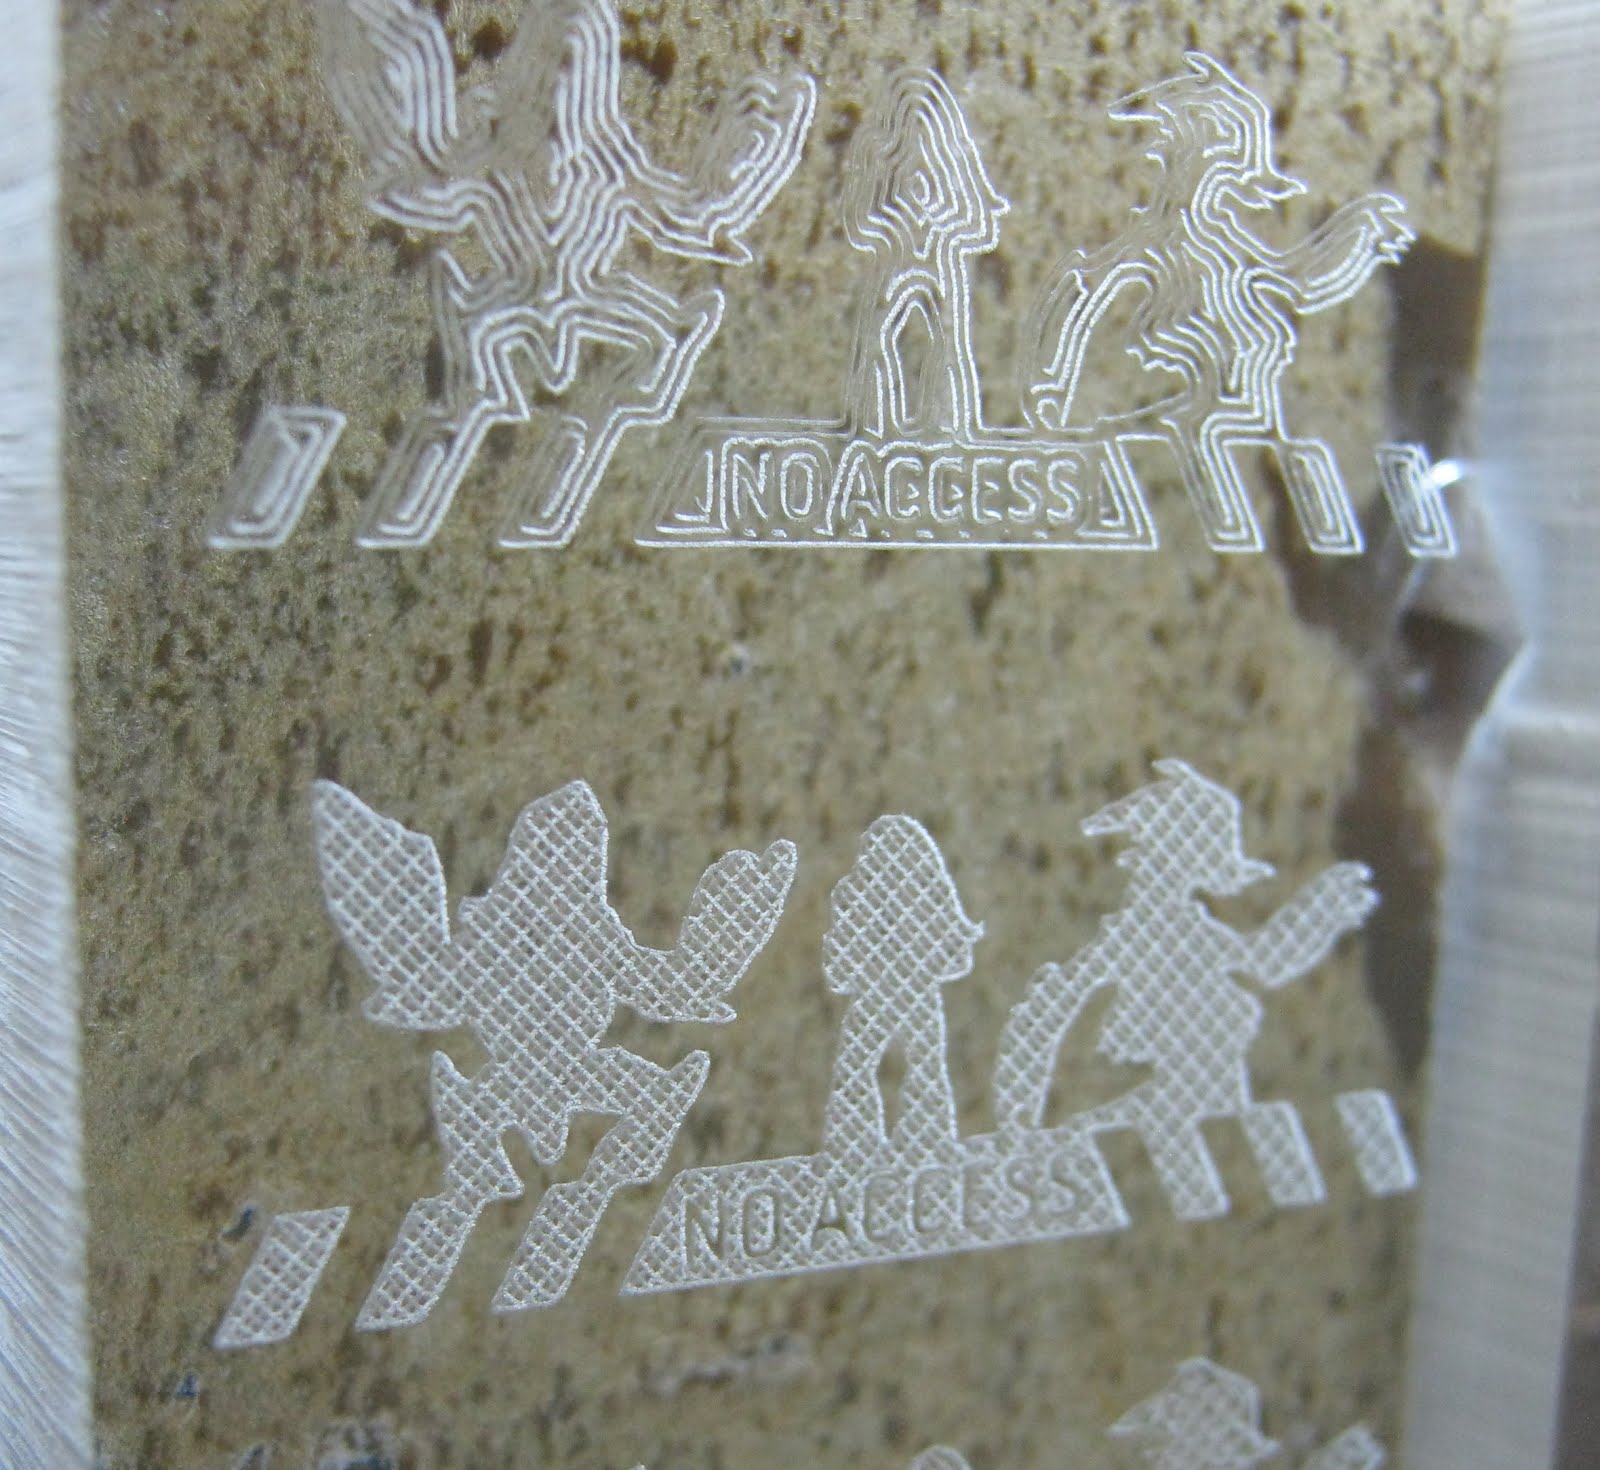
I put the entire tube in the router as though it were a 1/4" CNC bit and turned the router off to prevent spinning. A couple samples in scrap acrylic yielded a mixed success. The general shapes are visible, but the tube was too long with too much flex.
I reused the design from my dust boot to mount a larger support to the machine. The length of wood prevents flexing.
A thumb screw holds the tube in place. In this picture, you can see how the washer allows only the tip of the drag bit out. It lacks the vertical give of a professional holder, so it only works on flat work surfaces.
The new tests are much sharper! This is the level of quality I was striving for. You can see how the cross hatch pattern looks less scribbly.
My first project with the new drag bit was to make a replacement piece for a board game I enjoy. The original game piece was large, flimsy, and blocked that players' view of the spaces behind. For scale, the green bug on top is about the size of a quarter.